Search
How do I download and install the editor - Windows & Mac?
Getting started is easy — you can download our free photo book editor in just a few clicks!
On our website click the ‘Create Now’ button at the top right.
Enter your name and email to receive a 40% discount code for your first Photo Book.
Tick the ‘I’m not a robot’ box.
Click ‘Download Free Editor’.
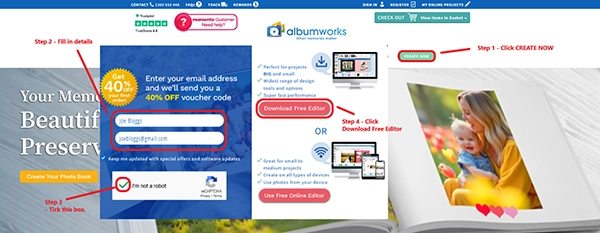
The download will start automatically, and it’ll detect whether you’re using Windows or Mac, so there’s no need to choose manually.
For Windows users:
Once the download finishes, look for the albumworks Setup file (albumworksSetup.exe) in the top right of your browser, or check your Downloads folder if you don’t see it. Click on the file and follow the prompts in the installation wizard.
Once installed, an albumworks icon will appear on your desktop — just double-click it to open the editor and get started.
In case you’re having trouble, here’s a quick tutorial for Windows Users.
For Mac users:
After downloading, open the installer file (albumworksSetup.dmg). If you can’t see it in your web browser, you’ll usually find it in your Downloads folder.
A window will appear with the albumworks setup icon on the left and an Applications shortcut on the right. Drag the albumworks icon into the Applications shortcut — that’s all you need to do.
Important: Don’t drag the setup file directly into the Applications folder — it won’t install properly if you do that.
Once the installation is complete, go to your Applications folder then open the albumworks folder. You can open the editor from there.. Want quicker access? Just drag the albumworks icon to your dock.
Need a bit of extra help? We've got a quick 2-minute tutorial that walks you through the whole download and installation process for Mac Users.