Search
How close to the page edge can I place my photos or text?
You can place photos anywhere on the page. Full-page or double-page images can look fantastic…but there are a few important layout tips to keep in mind to avoid trimming issues during production.
Trim and Bleed Zones
The red dotted line around the page indicates where the page will likely be trimmed, but the final trim can shift by up to 2–3mm either side of this line.
The blue line marks the bleed zone — if you want a photo to run right to the edge of the page, drag it out to this blue line.
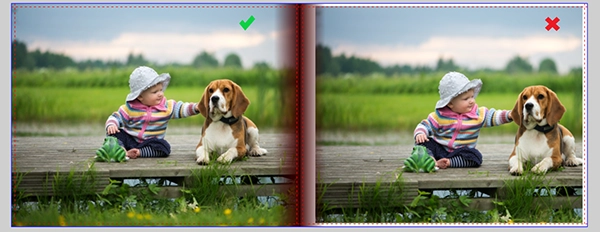
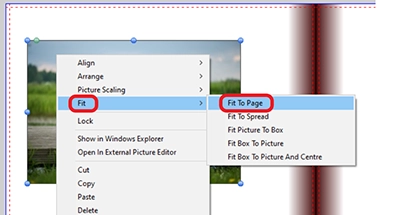
For full-page images, right-click the photo and choose ‘Fit’ > ‘Fit to Page’ to cover the whole area properly
Remember: Anything near the red line may be trimmed off. So it's essential to keep all important content inside the safe zone.
__________________________________
Safe Zones for Photos and Text
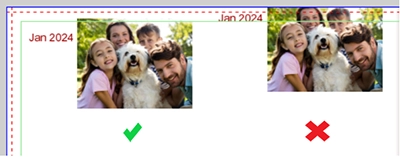
Keep all text and important parts of images (like faces) inside the Safe Line, that is, at least 6mm inside the red trim line.
There is an option in the download editor to show the Safe Line. Within your project click on the ‘View’ menu at the top of the editor. Then select ‘Grids & Guides’ > ‘Show Safe Line’. A green line will appear around the page - this is the Safe Line.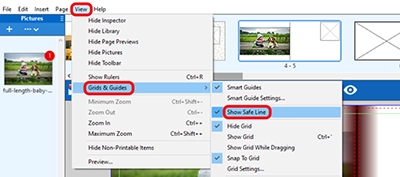
Avoid placing key elements too close to the spine (centre fold) — leave at least 2cm clear on either side. Note: This applies to books with Classic binding only. For Layflat books, you won’t lose any content in the centre of the book.
You can still run photos through the spine in a double-page spread, but make sure nothing important falls into the binding area, as it can get lost
The above principles also apply to the cover of your album if you’ve selected a Photocover.
For more tips on avoiding design issues, see our guide to common editor warnings.