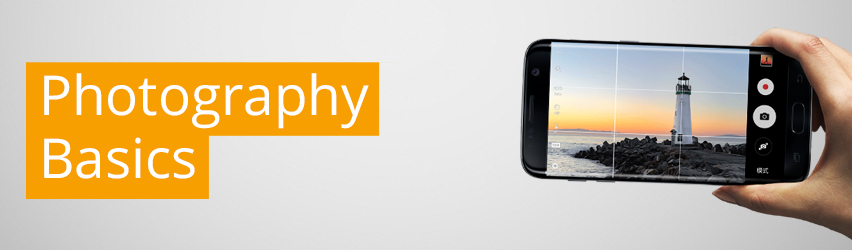
Photography Basics - how to take better photos!
NOVEMBER 20TH, 2020
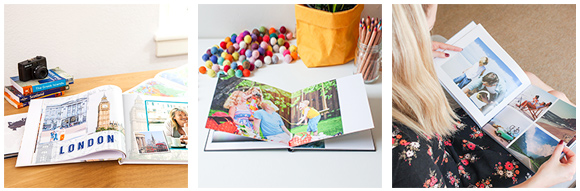
Our recent webinar was all about "Photography Basics". Keep reading to learn our tops tips to take better photos.
USING COMPOSITION
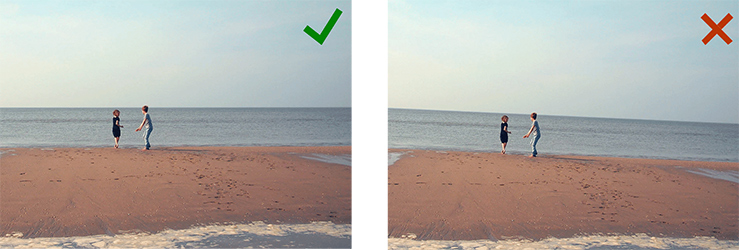
Tip 1:Use the horizon line to keep your photograph straight.
When a photo is level with the horizon line, it creates a sense of balance. Balance is great in photography as it creates stability for the viewer. You can see here an example of a balanced horizon line and an unbalanced version.
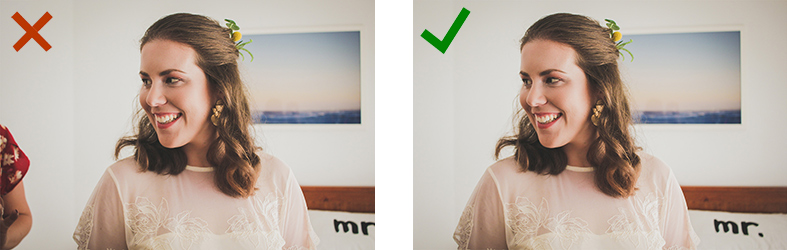
Tip 2: Fill the frame with necessary content.
The “frame” refers to what you see inside the photograph. It’s up to you what you fill the frame with, but it’s best practice to exclude any unnecessary content. In the example here, the focus is on the main figure. But in the example on the right, there is a distracting arm in the way. Simply moving the frame of the photo can crop this out, and we are left with only the important elements. We can also crop things out by zooming in or out before taking the photograph
Tip 3: Use symmetry to improve balance
We talked about creating balance by keeping your horizon line straight. And we can create even more balance by using symmetry within our photos. Placing your subject matter right in the center of your frame is the most simple and easiest way to create symmetrical balance. Here are two examples of symmetry in photography.
When photographing landscapes and buildings, shooting your subject from face on is a sure-fire way of creating symmetry.

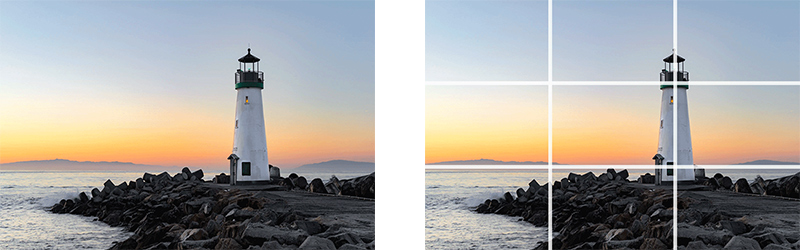
Tip 4: Use the “rule of thirds”
Every good photographer will be aware of the “rule of thirds”. As the name suggests, it begins with dividing the frame into 9 equal rectangles, 3 across and 3 down. You can use your imagination to divide your frame… otherwise, many camera manufacturers will give you the ability to turn on a virtual grid - as will iPhones and other phone cameras.
Now that you’ve got your equally divided rectangles, the rule of thirds suggests that you place the important element of the scene along one of the lines or where the lines intersect. As you can see in the example shown, the lighthouse runs right along the intersecting line. And my horizon line has been aligned with another intersecting line. The result is a well balanced photograph. The “rule of thirds” is one of our more complex tips, so if it sounds like too much work then you might like our next tip better.
Tip 5: Keep it simple
As we’ve said in some of our previous design webinars, “less is more”. Keeping your photos simple can be a safe way of making sure they turn out great. Think about simplifying the subject matter, and how you can capture the photo with the least amount of distractions. In this example, the photo on the right is too “busy”. The people are standing in front of a large mural and it becomes very distracting for the viewer. In the other example, all of the people are spread out evenly with a neutral background and we can see each person clearly.

USING LIGHT
Tip 1: Be aware of the sun when outdoors
When shooting photos outside, it’s important to consider where the sun is. There is no right or wrong when shooting with the sun, but sometimes it helps to adjust the direction in which you are taking your photo.
If someone is facing towards the sun, they may have difficulty seeing and squint their eyes.
If someone is facing away from the sun, then it can create highlights from behind. Or potentially cast shadows across their face.
So it’s a good idea to take a few different photos from different directions to make sure you get the best result.

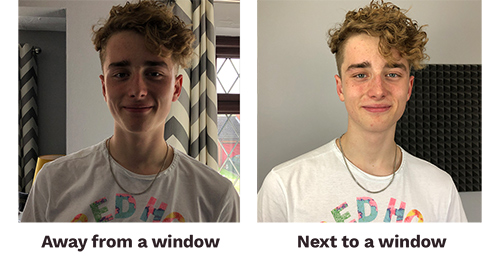
Tip 2: Use natural light to your advantage
A handy tip when shooting indoors is to use the natural light available. Light coming from windows is the best way to achieve this. Move your subject matter towards the window and you are more likely to capture a well lit photo. If you are far away from the window, you are more likely to capture shadows and dark tones.
Tip 3: Only use flash when there is low light
Cameras have come a long way recently, so you’re most likely using an up-to-date camera that has in-built light sensor technology. Even in relatively low light, digital cameras can take a decent photo. So you’ll only ever need to turn the flash on when it’s really dark.
Using the flash when there is sufficient light can create a bad result like in the example shown. You can remove the guess-work by adjusting your camera settings to “auto flash” then the camera will decide when it is appropriate to use the flash or not.

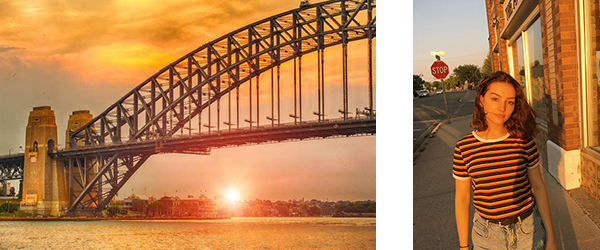
Tip 4: The Golden Hour
In photography, the golden hour is the period of daytime shortly after sunrise or before sunset, during which daylight is redder and softer than when the Sun is higher in the sky. The Golden Hour is a photographer’s best friend - when the sun is at a low angle it provides photographers with a magical quality of light that makes their photos pop. It’s a great time to pull out your camera if you get the opportunity. Here you can see some great examples of photos taken during the Golden Hour.
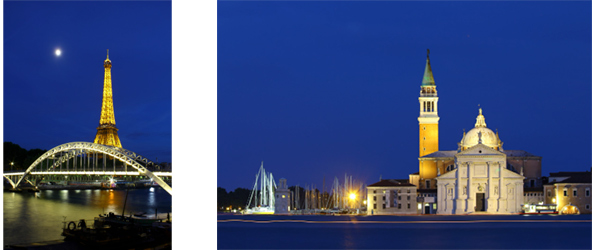
Tip 5: The Blue Hour
The blue hour is the period just before the golden hour at sunrise and just after the golden hour at sunset. This is the time when the sky has a deep blue hue and saturated colours. It’s also a time when street lights are on and buildings and monuments are lit up. This slide shows some of his photos taken in Paris and Venice during the blue hour.
PHOTOGRAPHING PEOPLE
Tip 1: Take lots of photos
People are constantly moving - whether it’s looking around, blinking or talking - so the more photos you can take the better! This will give you a range of photos to choose from and you can pick out the best one where everyone is smiling and looking at the camera. You won’t have to worry about wasting storage, as you can go back and delete any of the photos you don’t want to use.
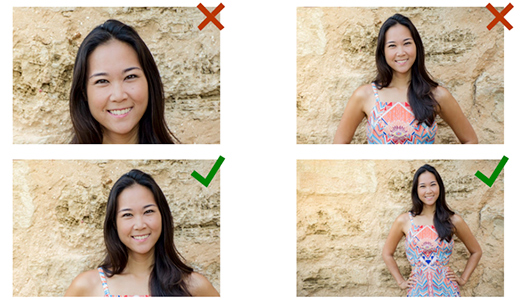
Tip 2: Declutter your background
A portrait will always be more memorable when the subject stands out from the background. So if you can, ask them to move away from cluttered backgrounds… or find a neutral wall to stand in front of.
Tip 3: Be careful where you crop
Where a person’s body is cropped, can sometimes have a negative effect. It’s a general rule of thumb to never crop a person at the neckline - this can make them look like a floating head. It’s better to include a little bit of their shoulders in the photo.
It’s also best practice to include the majority of a person’s arm inside the photo. Cropping it midway through the arm can result in looking like they have short arms.
These are just suggestions, but whatever looks best to your when taking the photo is probably the right choice.
We hope these tips help make your Photo Books sparkle!